Zoom Virtual Consultations Instructions

For Patients
These instructions are designed to help you and your doctor to get the most out of your virtual appointment using Zoom.
What to do Before You Start
Before joining the virtual appointment with your doctor, download and install the Zoom application for Windows or Mac.
Virtual appointments are most effective when done in a quiet room with no distractions. They require you to have the following:
- A computer with a working broadband internet connection
- A web browser installed on the computer. We recommend either Chrome, Safari or Edge
- A camera and microphone, either within the computer, or within a connected webcam
Review the email from your clinic to make sure you understand it, and contact the clinic before your virtual appointment if you have any questions. They may be helpful in making sure your consultation runs smoothly. If you are having difficulties on the day, contact the clinic reception. They can assist you, or can help to make alternative arrangements if you have problems with the consultation.
Instructions
STEP ONE: Click on the link provided to you in the clinic’s email. It will look something like this:

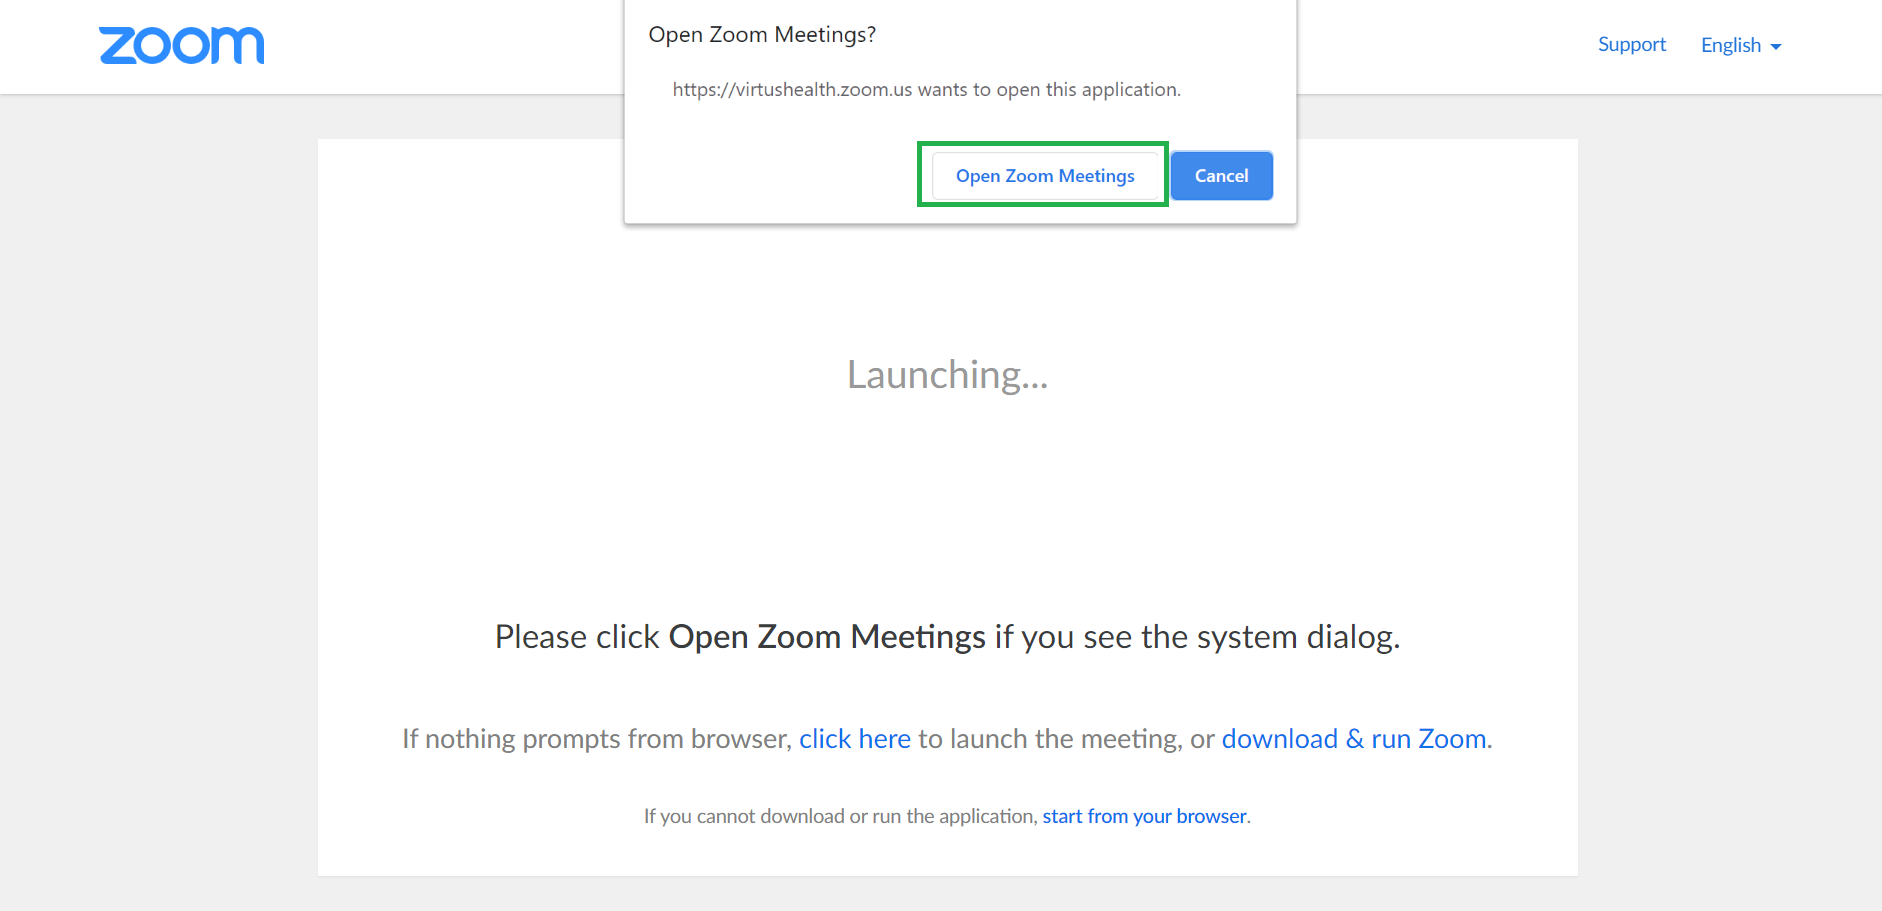
STEP TWO: Click Open Zoom Meetings to enter the Zoom application. Alternatively, you can use the link on the bottom of the page to start the meeting in your browser.

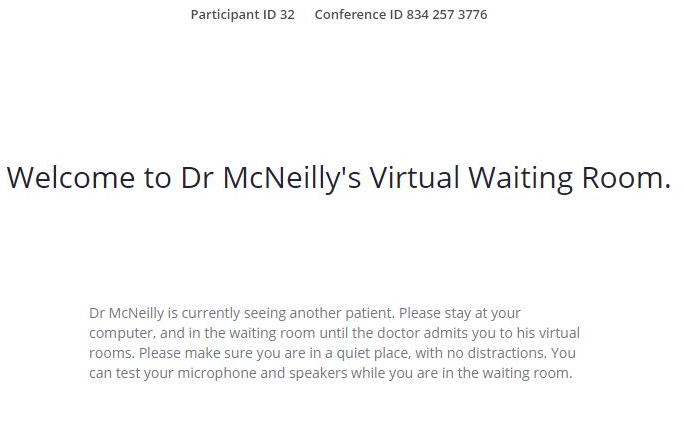
STEP THREE: You will be placed into the doctor’s Virtual Waiting Room until the doctor admits you to the appointment.
Please stay at your computer, ready for the doctor to start your appointment.


STEP FOUR: Once you admitted to see the doctor, use the buttons for audio and visual (circled in the picture to the right) to make sure your audio is not muted and your video has started. If you cannot hear or see your doctor, you can use the chat feature (circled in pink) to tell them.

STEP FIVE: When your consultation has finished, your doctor will close the meeting. At this time you can close the Zoom application.
